Deploying a Virtual Machine
Before creating an instance, several items need to be in place.
Make sure you have imported your SSH public key. Just in case you don’t have a key pair or you don’t know how to obtain it visit SSH Key Pairs
Create and check the security groups your VM will be using. These parameters will set the security of your VM but allowing or denying the access though different ports. You have more information on Security groups.
Launch an instance
Log in with your credentials at CESGA CLOUD. The dominion is hpc for all CESGA users.
Select instances on the left menu and click on Launch Instance.
In the Launch Instance dialog box, specify the desired characteristics of your MV. Any feature marked with an * is mandatory.
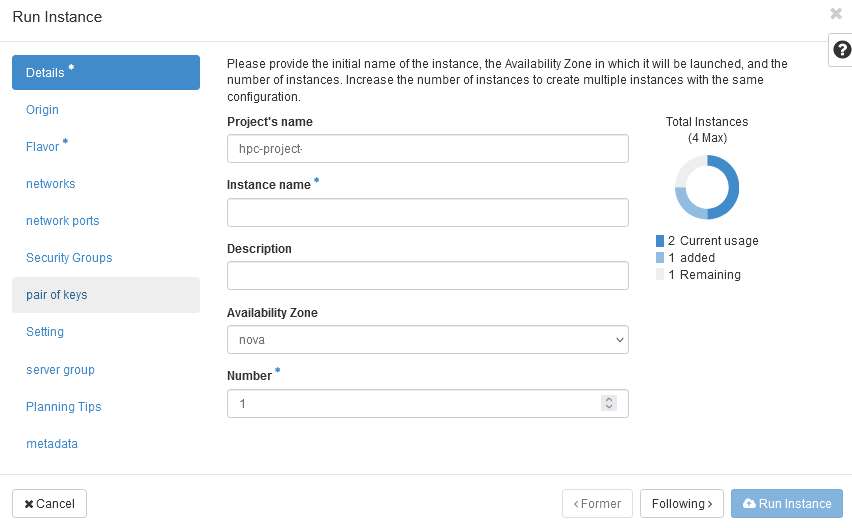
Details:
Project’s name is set by default as hpc-project-username.
Instance’s name: select your VM’s name.
Number: 1 by default. This number refers to the number of VMs you want to deploy with the same characteristics.
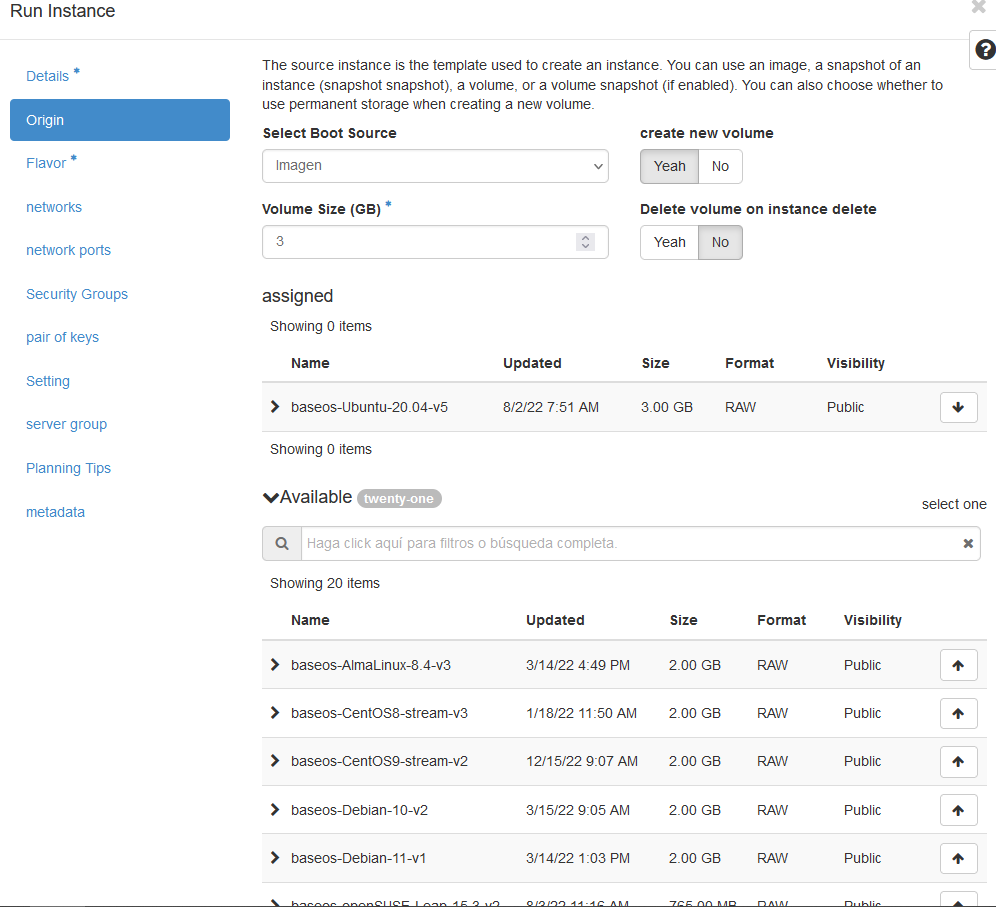
Origin:
Select the OS desired for your VM just clicking on the Up arrow button. For this example we selected baseos-Ubuntu so, when a OS is choose, it would appear as shown.
Volume size is marked as a mandatory parameter but the system will automatically select it.
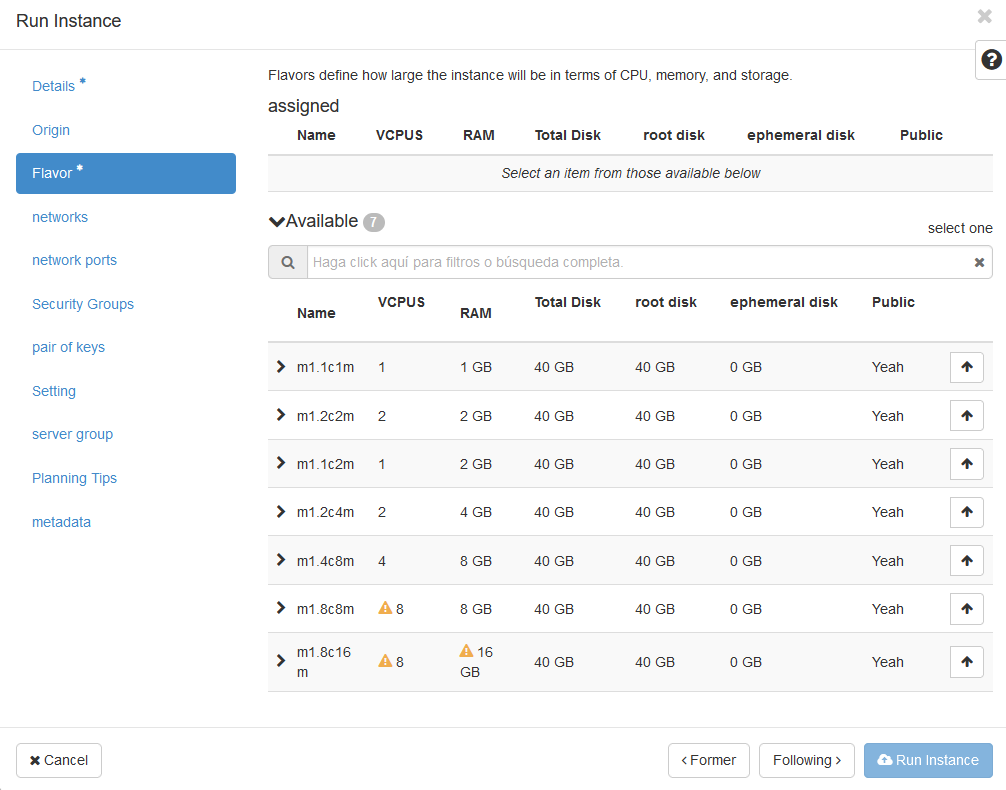
Flavour:
Define the cores and RAM requirements for your VM.
Those 40GB of disk are meant to be for the OS. The properly disk storage will be set as a volume. You have more information about storage and volumes.
Other parameters:
Networks and networks ports: should be left as default unless your VM requires a special configuration.
Security groups: select all the security groups you have created before. If you didn’t create any, don’t worry, you can add it later.
Key pair: if you only have one key pair associated with your account it would be automatically selected. If you have more that one you should specified the one you will be using. You can only select one key pair but more key pairs can be added to the VM on the authorized_keys file.
There are more configuration parameters you can change at settings, server group and metadata but they are non-mandatory and are meant for advanced users and features a VM would required.
Once you have all your requirements selected, just click on
Run Instance. The VM will be shown as a new input on the dashboard.
Click on the right side to unfold the settings and:
Select
Add volumeand attach the volume for data storage previously created.Select
Associate floating IPto give one to the VM. This IP will be use to enter the VM.
Accesing the VM via SSH
To access the VM via SSH, you can use directly your command line terminal but you must check if you have configured the SSH public and private keys, otherwise it won´t work. You can also access using MobaXTerm or a similar client.
Warning
It’s very important that if you have created your SSH keys directly from OpenStack, you must add the key file generated to be able to enter the VM as follows:
Start a new session at MobaXTerm
Open the SSH tab and configure it as follows: Remote host is the floating IP given to your VM and the username is always cesgaxuser.
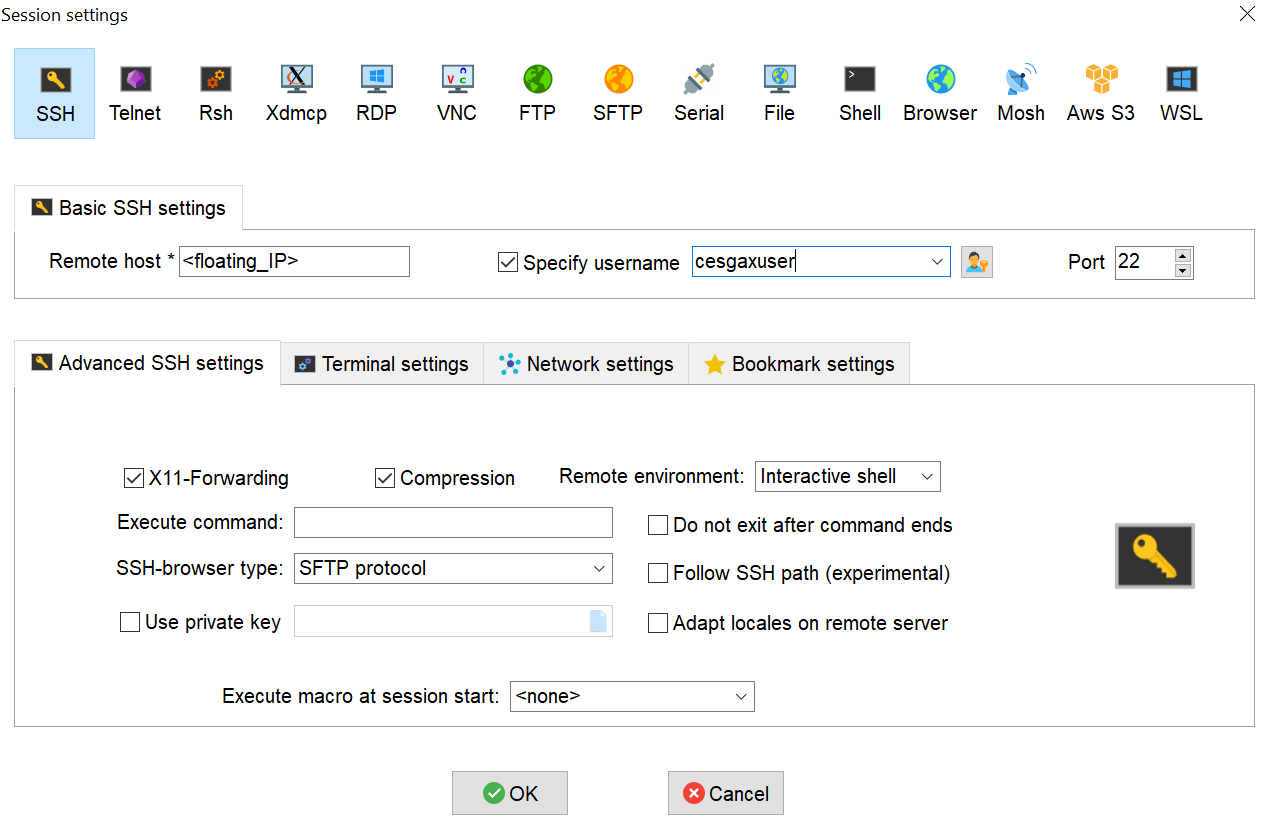
You have to open Advanced SSH Settings, check Use private key and select the file that was generated by OpenStack.
Save this configuration.
Now, you can access your MV using: ssh cesgaxuser@floating_IP_of_your_VM
Cesgaxuser is the default user to access all VM deployed at Openstack. You won’t be using your CESGA username in this case.
Warning
If you add more volumes to your VM, don’t forget to mount it <https://cesga-docs.gitlab.io/cloud-openstack/volumes.html>`_